

By Olivia Parker
Leather boots develop creases, subtle color changes, and the occasional scuff as you wear them. Those details can suit a well-loved pair. Grit caught around the seams, white salt marks, and leather left drying beside a radiator need a different kind of attention.
Learning how to care for leather boots starts with identifying their finish. A smooth black Chelsea boot, a waxed brown lace-up, and a sandy suede ankle boot may share a shelf, but they should not automatically share a conditioner.
To care for leather boots, remove loose dirt, clean with a method approved for the finish, and let wet boots dry naturally. Condition compatible leather when it needs attention, choose suitable polish or weather protection, and store boots only when fully dry. Follow the bootmaker’s instructions and test unfamiliar products on a concealed area before treating the pair.
Identify the Finish Before Choosing a Product
Check the original product page, care card, or material label before opening a cleaner. Color and boot shape tell you very little about which treatments the surface can tolerate.
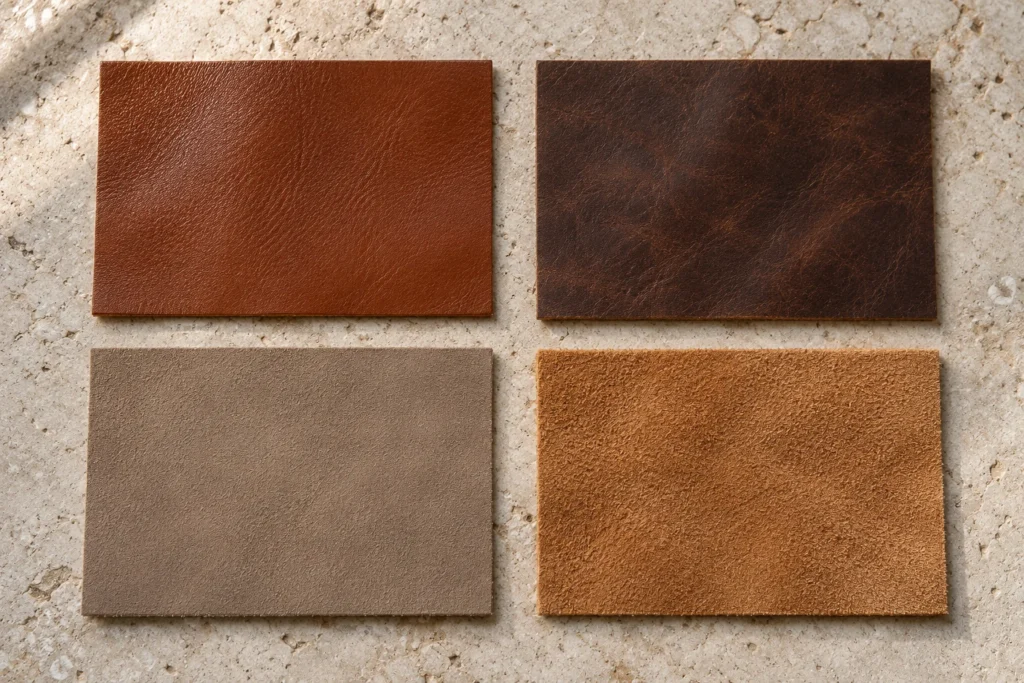
A brown boot might have a polished finish, an oily surface, or a waxed coating. Each can respond differently to moisture, brushing, and conditioning.
Use this as a starting point:
| Boot material or finish | Sensible first approach | What needs particular care |
|---|---|---|
| Smooth finished leather | Soft brushing, controlled wiping, and approved leather-care products | Abrasive scrubbing and products that change the color |
| Oiled or waxed leather | Follow the maker’s instructions for that finish | Preserving its intended texture and sheen |
| Suede or nubuck | Gentle dry brushing first; specialist cleaning when needed | Flattening the nap with ordinary creams or waxes |
| Patent, metallic, printed, or specialty finishes | Use the specific care instructions | Damaging the surface coating |
| Faux leather | Follow the synthetic upper’s care label | Assuming a conditioner for animal leather is suitable |
Blundstone’s boot-care guide provides separate instructions for leather, suede, and nubuck, illustrating why material identification matters.
Before using a new product, treat a small hidden area of the outer leather. Let it dry completely, then inspect it in daylight. Check the color, texture, and shine before continuing.
A darker patch may be an unwanted change even if the leather feels softer. This is particularly important with pale tan, cream, and light-brown boots.
How to Clean Leather Boots Without Soaking Them
For many smooth finished boots, routine cleaning means removing surface dirt with a soft brush and a carefully wrung-out cloth. A thorough soaking is unnecessary.
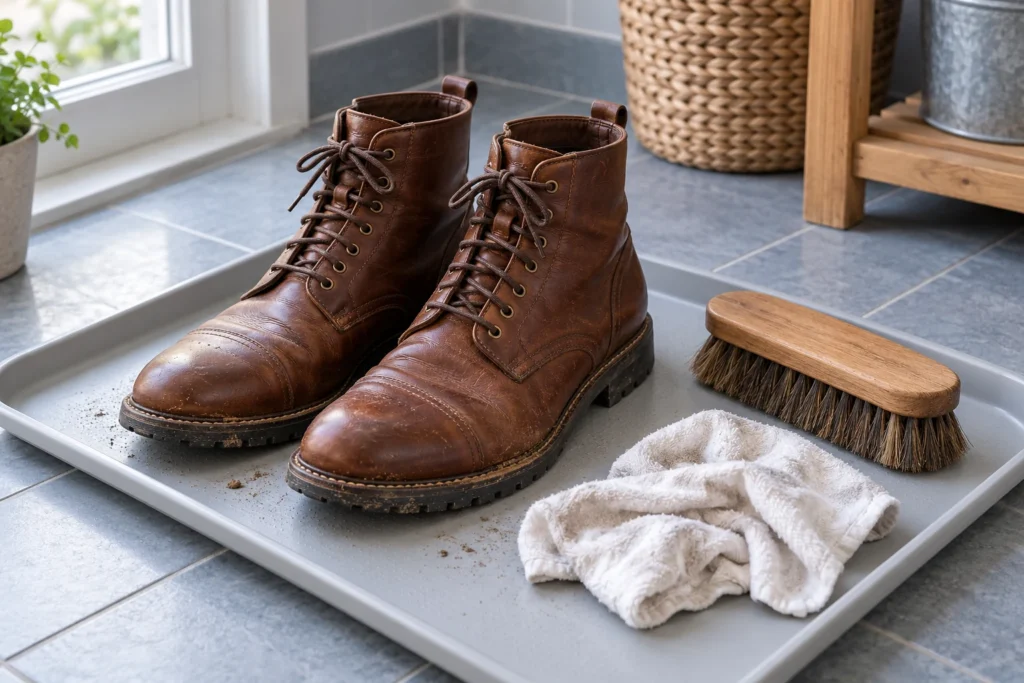
Start with a few simple supplies: a soft brush, clean cotton cloths, and a cleaner approved for your boots. Keep a separate brush for the soles so grit does not get transferred onto the uppers.
Remove Loose Dirt First
Remove the laces if they obstruct the tongue or eyelets. Take out insoles only if they are designed to be removable.
Brush gently around the upper, seams, and the join between the leather and sole. Let ordinary unsalted mud dry enough to brush away without smearing it across the boot. Salt contamination needs prompt attention rather than being left until your next cleaning session.
Clean dirt from the tread separately, taking care around the sole edges.
Wipe With Controlled Moisture
Where the maker permits it, use a soft cloth lightly dampened with lukewarm water. The cloth should not drip.
Work gently across the surface. Avoid repeatedly scrubbing one small patch, especially if the color begins transferring or the finish changes.
If water alone does not remove the dirt, use an approved leather cleaner according to its directions. Remove residue as instructed, then leave the boots to dry naturally.
Red Wing’s care instructions emphasize soft brushing, suitable cleaning products, and drying away from direct heat.
Avoid the washing machine, immersion, and vigorous scrubbing. Saddle soap is also a product to check against your bootmaker’s advice; its suitability should not be assumed.
If sneakers share your footwear shelf, our guide to cleaning white sneakers explains the different needs of leather, canvas, mesh, and mixed-material uppers.
Dry Wet Leather Boots Slowly
After a rainy commute, open the boots up so moisture can escape. Trying to rush the process with heat can create a bigger problem than the original soaking.

Blot excess water with a clean cloth. Loosen the laces and pull the tongues forward where the construction allows. Remove removable insoles and let them dry separately.
Place plain white absorbent paper loosely inside the toes, replacing it as it becomes damp. Use enough to support the shape without stretching the upper. Avoid printed paper that could transfer ink.
Leave the boots in a ventilated room away from:
- Radiators and portable heaters.
- Open fires.
- Hair dryers.
- Strong direct sunlight.
Nikwax’s footwear guidance warns that direct heat can damage leather and bonded soles. Timberland’s cleaning advice also recommends avoiding inked paper when supporting wet footwear.
There is no dependable drying time for every boot. Leather thickness, lining, how wet the pair became, and room conditions all matter.
Check the lining and footbed as well as the outside before wearing or storing the boots. A dry-looking upper does not necessarily mean the interior is ready.
Condition Smooth Leather Only When It Needs It
Conditioner can help suitable leather stay supple, but a boot does not need another coat simply because a month has passed.
Consider the finish, the manufacturer’s advice, and how the cleaned leather feels. Look for a change toward dryness or stiffness compared with the boot’s normal condition. Ordinary creases or a matte appearance alone are not a reason to keep adding product.
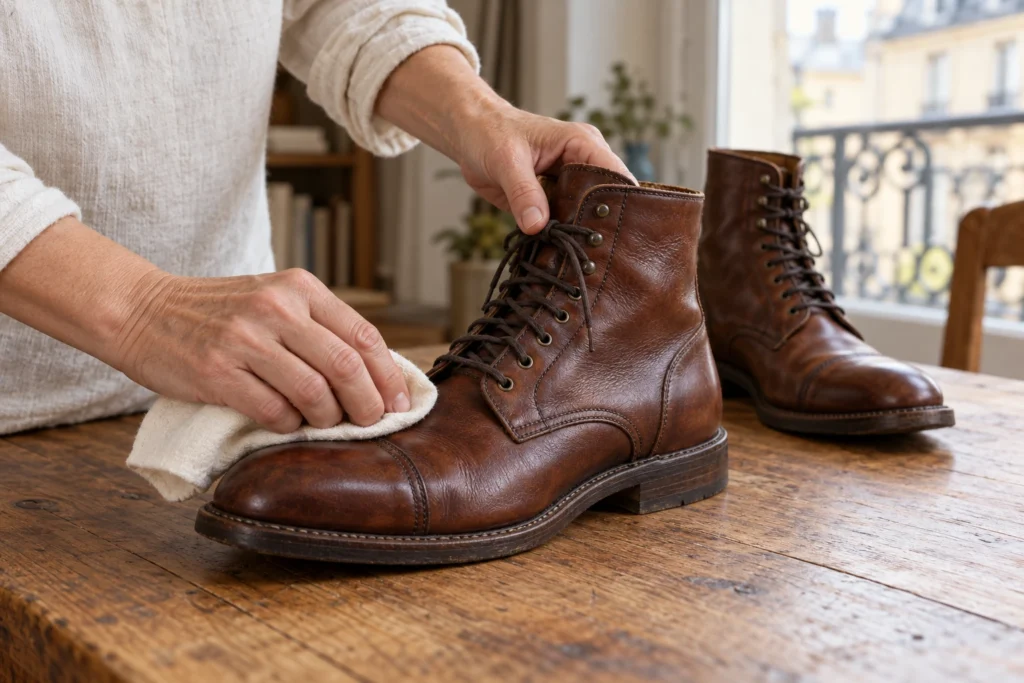
For a compatible conditioner:
- Start with clean leather that is dry, unless the product specifically directs otherwise.
- Test a small concealed area and assess it after drying.
- Apply a thin, even layer with the recommended cloth or applicator.
- Allow the absorption time stated on the label.
- Remove excess and buff gently if instructed.
Stop before the surface becomes greasy. Red Wing’s boot-care FAQ explains that excessive conditioning can soften leather too much and leave a surface that attracts dirt.
Pay particular attention to color. A treatment that deepens light tan boots to a richer brown may change how they look with cream trousers, pale denim, or a matching belt.
Shop the Inspiration — care option: Red Wing Leather Cream, style 97095, is specified for smooth-finished and oil-tanned leather. The brand describes it as formulated to condition without darkening or adding shine. Test your own pair before applying it broadly.
View Leather Cream at Red Wing — US
Check regional stock, current prices, and delivery terms on the destination site.
Choose Polish and Weather Protection for Your Boots
A soft sheen can suit a dressier ankle boot, while a rugged waxed pair may look best with its original muted surface. Decide which finish you want to preserve before adding polish.

Use Polish Where It Suits the Leather
An approved colored cream or polish can help disguise minor surface color loss. A wax polish can add shine. Neither should be expected to repair deep damage.
Apply a small amount, match the color carefully, and buff as instructed. Keep polish away from suede, nubuck, elastic panels, and specialty finishes unless the product expressly permits them.
Dr. Martens’ polishing guide addresses polishing smooth leather specifically.
The amount of shine is partly a styling choice. A restrained finish works well with tailored trousers and dark denim. Casual leather boots do not need a mirror shine to look well cared for.
Match Weather Protection to the Whole Boot
Choose a treatment approved for the leather finish and any waterproof membrane. Surface water repellency does not make every boot suitable for deep puddles or prolonged wet weather.
The order of treatment can vary. Nikwax’s FAQ says its Waterproofing Wax for Leather can be used on wet or dry footwear. Other treatments have different application requirements.
Read the label before assuming protection always goes onto a dry boot. Follow any instructions about ventilation and drying time before wearing the pair.
Shop the Inspiration — weather-care option: Nikwax Waterproofing Wax for Leather is intended for smooth leather. Its instructions warn that it may darken leather and will change nubuck to a smooth waxy finish. Check compatibility before buying.
View Product Details at Nikwax — UK
Remove Salt Marks and Other Stains Carefully
White winter tide marks need residue removal before cosmetic finishing. Covering them with polish makes it harder to judge whether the underlying problem has been addressed.
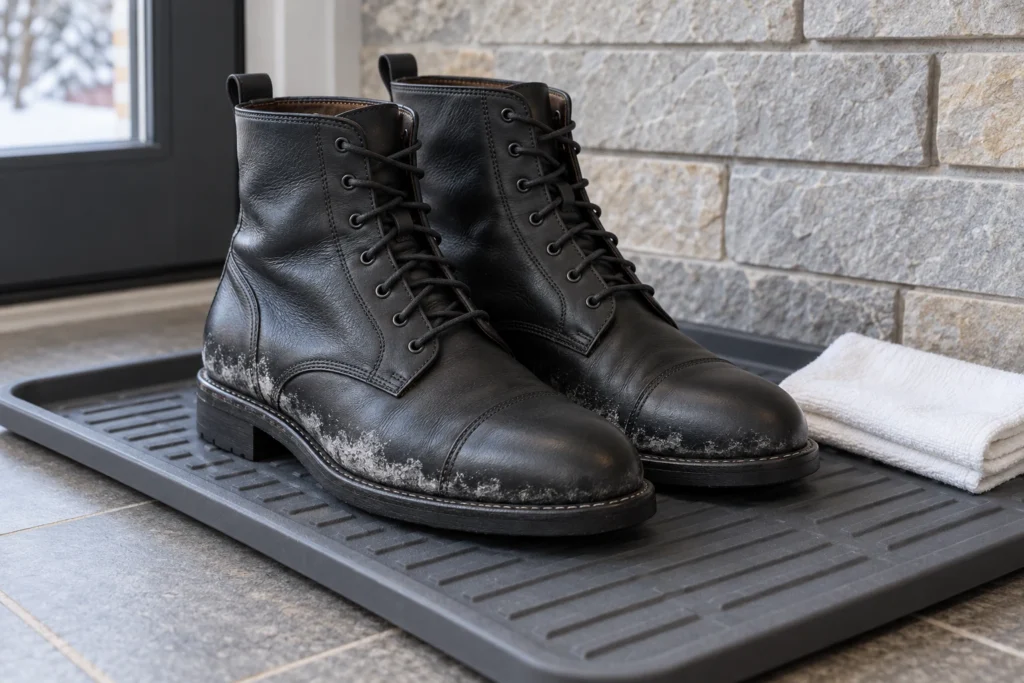
Salt Residue
On smooth leather that permits damp wiping, gently remove surface residue with a clean, lightly dampened cloth. Avoid saturating the boot.
If marks remain, use a compatible leather salt-stain remover, following its directions. Check the bootmaker’s restrictions, especially for specialty finishes.
Saphir’s Hiver Winter instructions call for removing surface dirt, applying the product with a soft cloth, letting it dry, and testing a hidden area first.
Once the boots are dry, assess their condition before adding conditioner or polish. Removing residue and restoring lost color are separate tasks.
Shop the Inspiration — targeted cleaner: Saphir Hiver Winter is formulated for white marks associated with salt, water, and snow.
View Hiver Winter at Saphir — UK
View Hiver Winter at Saphir — Australia
Scuffs, Oil, and Unfamiliar Stains
A light surface scuff may improve with approved cleaning and gentle buffing. A gouge or an area where the finish has worn away needs a different assessment.
Blot a fresh spill rather than spreading it across the upper. For oil, ink, or an unknown stain, ask the manufacturer or a leather specialist before experimenting with stronger cleaners.
Skip household stain-removal recipes involving toothpaste, baking soda, or lemon juice. Blundstone’s restoration advice favors products designed for leather and recommends professional help for more serious damage.
If repeated cleaning is changing the texture or lifting the color, stop. More effort is unlikely to improve the result.
Give Suede and Nubuck Their Own Care Routine
The fine raised surface gives suede and nubuck their softness and changing depth of color. Care should preserve that texture.
Start with dry boots and a brush suitable for the material. Use light strokes rather than pressing hard against the surface.

For a small mark, try an approved suede or nubuck eraser if appropriate. Test gently and brush away the residue. Repeated hard rubbing can alter the finish.
For dirt that dry care will not remove:
- Choose a specialist cleaner approved for the material.
- Follow its application instructions, including whether to treat a larger area evenly.
- Avoid making one small patch excessively wet.
- Allow the boots to dry naturally.
- Gently restore the nap once dry.
Dr. Martens’ suede-care guide advises gentle cleaning, natural drying, and brushing after drying.
Oiled nubuck and waxed roughout can have specific requirements. Keep following the instructions for your actual pair rather than treating every textured leather as standard suede.
Shop the Inspiration — dry-care tool: Timberland’s Dry Cleaning Kit contains a cleaning bar and nylon brush for suede, nubuck, and canvas.
View the Dry Cleaning Kit at Timberland — US
Store, Rotate, and Repair Before Damage Spreads
Storage starts when you take the boots off. Give the lining time to dry, check the soles, and leave enough space around the pair for air to circulate.
Once dry, use correctly sized shoe or boot trees if appropriate. They should support the shape without forcing the leather outward. Tall boots can benefit from shaft supports that prevent the uppers folding sharply.
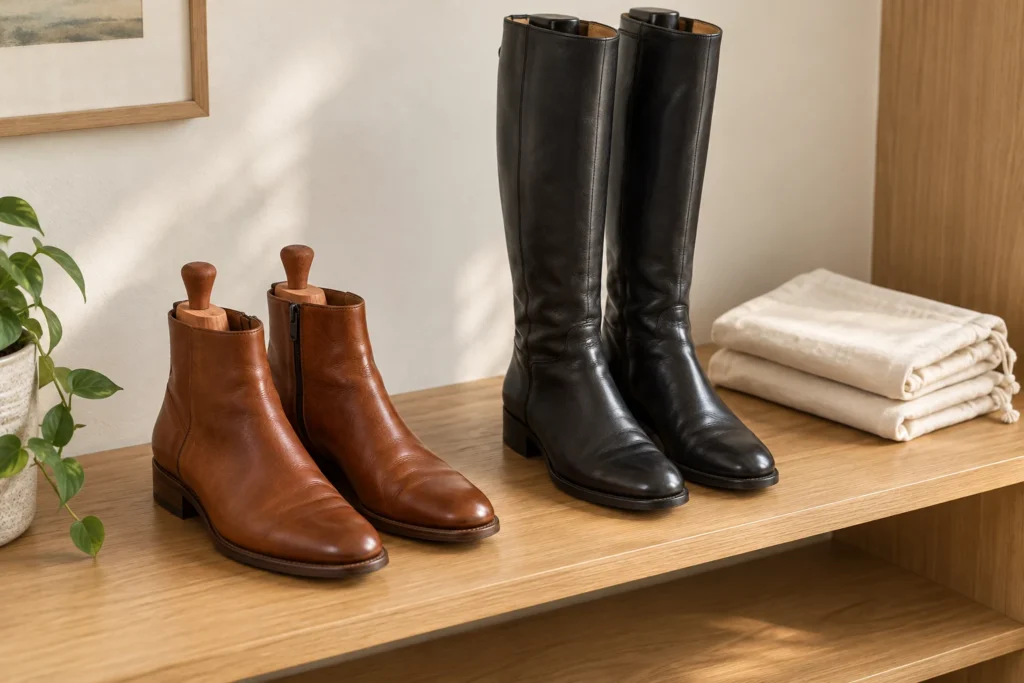
Keep stored boots somewhere cool, dry, ventilated, and away from direct sunlight. Use breathable storage bags when helpful, and avoid sealing damp footwear inside plastic.
When possible, alternate boots with footwear you already own. A pair that is still damp inside needs more drying time before its next outing.
Check regularly for:
- Worn heel edges.
- Thinning tread.
- Loose stitching.
- Separation between the upper and sole.
- Deep cracks or tears in the leather.
Red Wing’s maintenance guidance recommends addressing wear and damage early. A cobbler can assess whether the construction permits resoling or another repair; repairability varies.
Pay attention to trouser length, too. Hems that drag through wet pavement can keep brushing moisture and dirt against the boots. Our guides to styling black jeans for men and choosing shoes for wide-leg pants explain how the hem should sit with different footwear.
Frequently Asked Questions
How Often Should You Condition Leather Boots?
Follow the manufacturer’s guidance and assess the leather when you clean it. Condition compatible leather when it needs attention. Frequent wear and harsh conditions may change the routine, but every pair does not need monthly treatment.
Can Leather Boots Get Wet?
Some are designed for wet conditions; others need more protection. Check the model’s weather rating and care instructions. After accidental wetting, remove excess moisture and let the boots dry naturally before assessing their condition.
Is Leather Conditioner the Same as Boot Polish?
They serve different primary purposes. Conditioner helps maintain suitable leather’s suppleness, while polish focuses on color and surface finish. Some formulas combine functions, so check the product’s stated use and material restrictions.
Can You Use Smooth-Leather Conditioner on Suede Boots?
Only if the manufacturer specifically approves that product for that finish. Ordinary smooth-leather creams and waxes can change the nap and appearance. Start with suede-specific care.
Will Conditioner Fix Cracked Leather?
It may improve the feel of surrounding dry leather, but it does not rebuild split leather. Deep cracks, tears, and gouges need professional assessment. Blundstone’s restoration guidance notes that cracks remain even after conditioning.
Do New Leather Boots Need Conditioning Straight Away?
Not automatically. Check the care instructions and any factory-applied finish first. New boots may benefit from an approved protective treatment, but adding a heavy conditioner without a reason can change their appearance.
Keep the Routine Simple
A useful boot-care routine is easy to repeat: remove dirt, manage moisture, check the finish before choosing a product, and inspect wear before it becomes a larger repair.
Start with the tools your pair actually needs. With regular attention, boots can keep the texture and character that made you choose them in the first place.




1 thought on “How to Care for Leather Boots Without Damaging the Finish”