
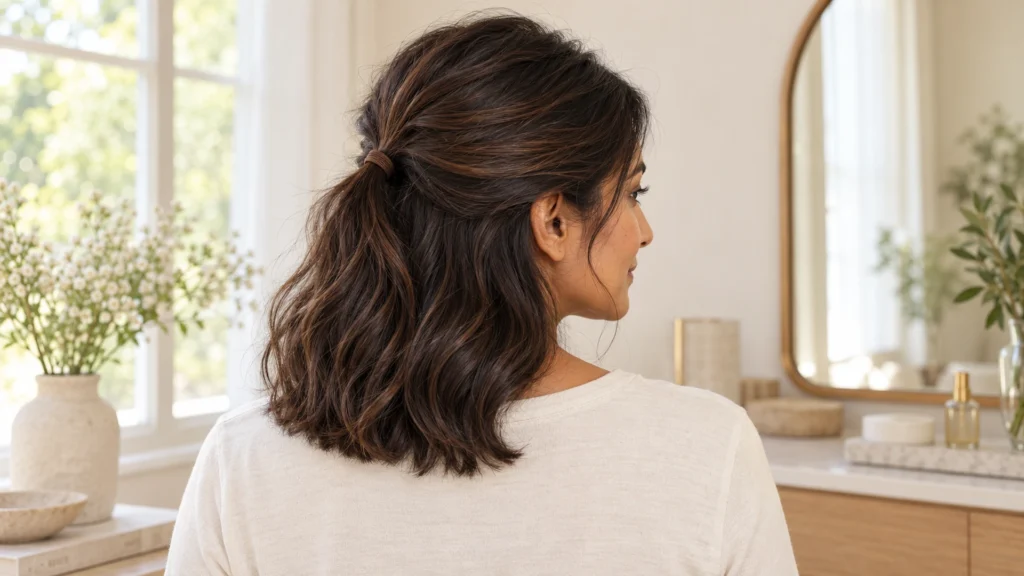
A ponytail that drops out at the nape or a bun that needs another handful of pins usually calls for a different placement. With medium-length hair, the easiest style depends on which sections can reach the fastening point comfortably.
These easy hairstyles for medium-length hair start with your existing texture. A half-up ponytail suits shorter layers, a low loop bun uses a modest amount of length, and a loose puff lets curls keep their shape. None of the eight styles below requires a curling iron, flat iron, or added hair.
Start with the option that matches your cut today. You can change the part, fastening position, or amount of hair gathered without rebuilding your whole routine.
Choose a Style That Works With Your Length and Texture
For this guide, medium length means roughly shoulder to collarbone length when worn in your usual finish. That is a working description, not a haircut standard. Curls may sit higher when dry, and a layered cut can have much shorter pieces around the face and crown.
Check your shortest layers first. Gather your hair gently at the nape, then a little higher. Notice where it stays together without pulling. If the bottom falls out of a higher ponytail, a lower fastening point or half-up style is the more practical choice.
If you are growing out a lob, our guide to bob haircuts for different hair types explains how the perimeter, layers, and natural texture affect the shape.
| What You Want | Start With | Useful Adjustment |
|---|---|---|
| Hair away from your eyes, length left loose | Half-up ponytail or pinned side twists | Gather smaller sections if the sides feel tight |
| Hair off your neck | Low loop bun or claw-clip twist | Keep the fastening low enough to catch the nape |
| A simple shape for work or errands | Low ponytail | Leave bangs separate if they do not reach |
| Curls gathered without straightening | Loose mid-height puff | Lower the base if the nape needs stretching |
| A small detail with most hair down | Side accent braid | Braid only the section that comfortably reaches |
| Two manageable sections | Two low braids | Bring each section forward while braiding |
A small kit is enough: a comb suited to your texture, fabric-covered elastics, a few bobby pins, and a claw clip that fits the amount of hair you plan to gather. A second mirror helps you check the back.
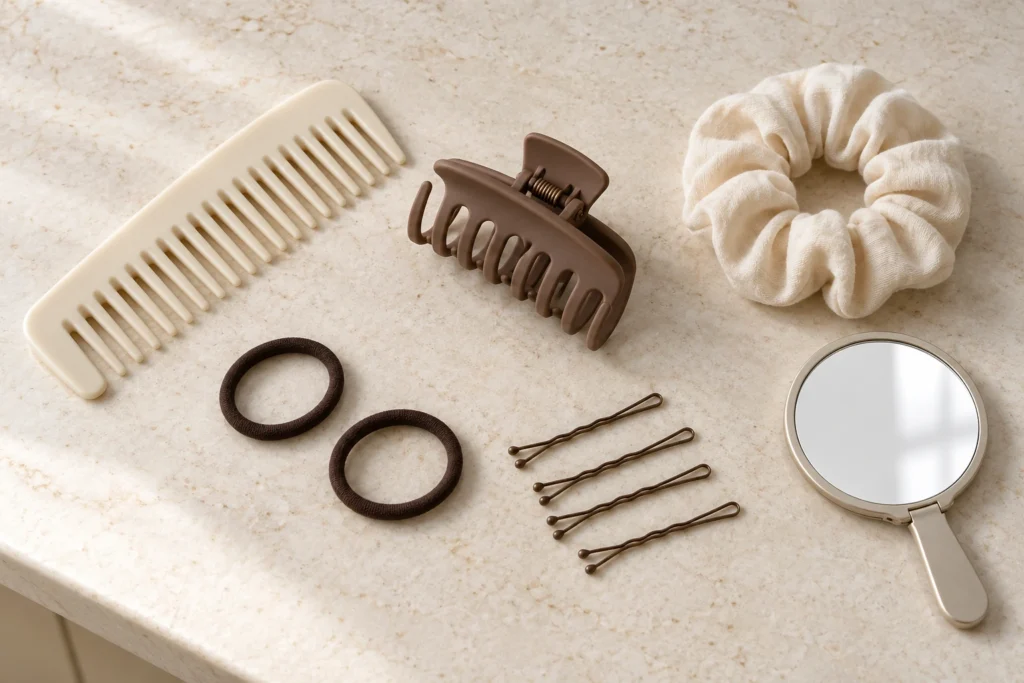
Detangle gently before arranging the hair. The American Academy of Dermatology’s healthy-hair guidance recommends starting at the ends and working upward. Straight hair can dry a little before combing, while thick curly hair can be combed with conditioner still in.
Keep the finished style comfortable. The AAD warns that repeated tension from tight hairstyles can cause hair loss. Loosen or remove a style that hurts rather than trying to make the discomfort disappear beneath more product.
Two Half-Up Hairstyles for Shorter Layers
1. The Small Half-Up Ponytail
This is a useful starting point when the front needs containing but the lower layers cannot reach an updo. Leaving most of the hair loose also preserves the visible outline of a shoulder-length cut.
- Make your usual part. Leave out any bangs you want to wear around your face.
- Slide your thumbs back from just above your ears, gathering the upper section.
- Bring that section together behind your head without lifting it so high that the sides pull.
- Secure it with a small fabric-covered elastic, then gently settle the loose hair underneath.
For fine or lower-density hair, gather less from the sides so the lower section still looks substantial. With dense hair, use a tie that comfortably holds the section rather than repeatedly stretching a tiny elastic.
If the crown looks flatter than you intended, use your fingertips to ease a little hair above the tie. Avoid pulling the ponytail apart forcefully to tighten the base.

A small half-up ponytail works well with a casual T-shirt, an open shirt collar, or a simple dress. The fastening can stay understated, especially when you want the natural texture to remain the main detail.
2. Two Pinned Side Twists
Choose this when you want less hair gathered at the back, or when a half-up ponytail leaves the sides feeling too stretched.
Take a small section near one temple. Turn it loosely away from your face, guide it toward the back of your head, and secure it with a bobby pin that catches both the twist and a little underlying hair. Repeat on the other side.
The twists can finish separately; they do not need to meet.
Keep each section narrow enough to twist without becoming a bulky roll. If a pin slides out, reposition it to catch more underlying hair rather than pressing it harder against your scalp. A second crossed pin can help anchor the end.

Let shorter fringe pieces remain separate. For help shaping them, see how to style curtain bangs at home.
For a softer finish, keep the twists close to their natural direction of growth. Pulling them sharply upward creates a different shape and may make the temples feel tight.
Two Low Updos for Medium-Length Hair
3. The Low Loop Bun
A loop bun works when you have enough length for a low ponytail but not enough to wrap the tail around its base neatly.
Gather the hair at your nape and begin securing a ponytail. On the final pass through the elastic, pull the tail only partway through, leaving a small loop and a short loose end.
Adjust the loop with your fingers so it rests comfortably against the back of your neck.
Leave the end visible for a casual finish, or pin it beside the base if it reaches. With a shorter cut, keep the loop small; pulling more hair through can release the entire tail.
If the nape falls out, move the bun lower. A couple of short wisps can remain loose. You do not need to force every strand into the elastic.
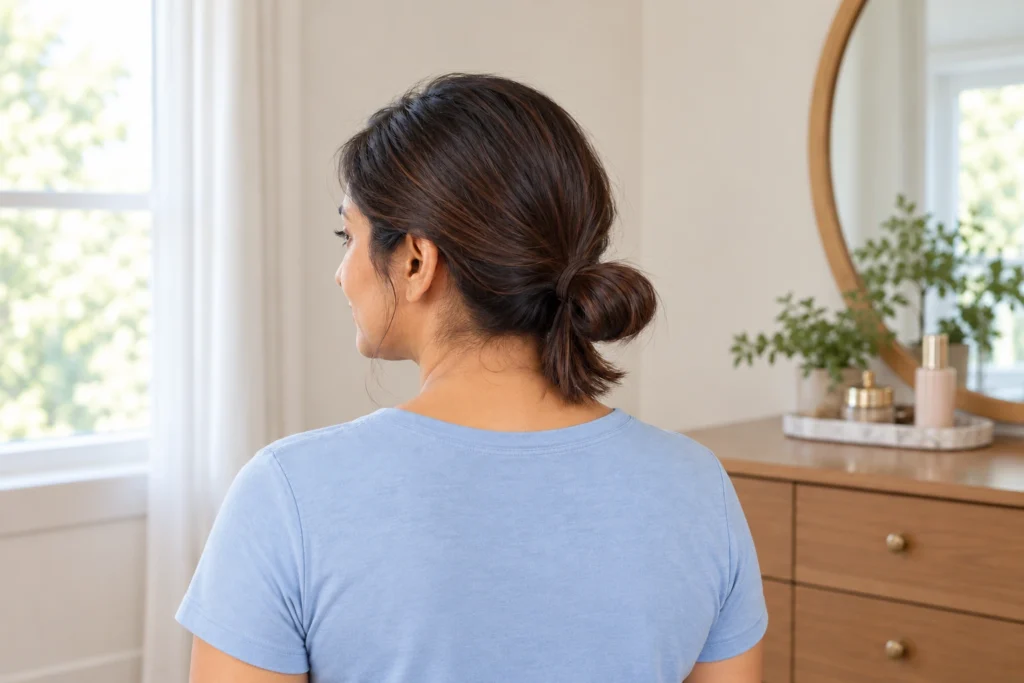
Before settling on the position, check it against your clothing. A bun resting directly on a stiff shirt collar may be pushed upward whenever you turn your head. Moving the fastening slightly can make the style easier to wear.
4. The Low Claw-Clip Twist
The important choice is clip capacity. A very large clip can slide around a small section, while a shallow clip may not close around dense hair.
- Gather your hair loosely at the nape.
- Twist the gathered length once or twice, just enough to form a compact section.
- Turn that section upward against the lower back of your head.
- Open the clip over it so the teeth catch the twist and some hair beneath, then release the jaws carefully.
Let short ends peek above the clip. If your hair is too short to turn upward, clip the small twist close to the nape instead.
If the jaws cannot close without forcing them, try a roomier clip or use the clip for a half-up style. The clip should hold the section without needing to be pressed hard against your scalp.
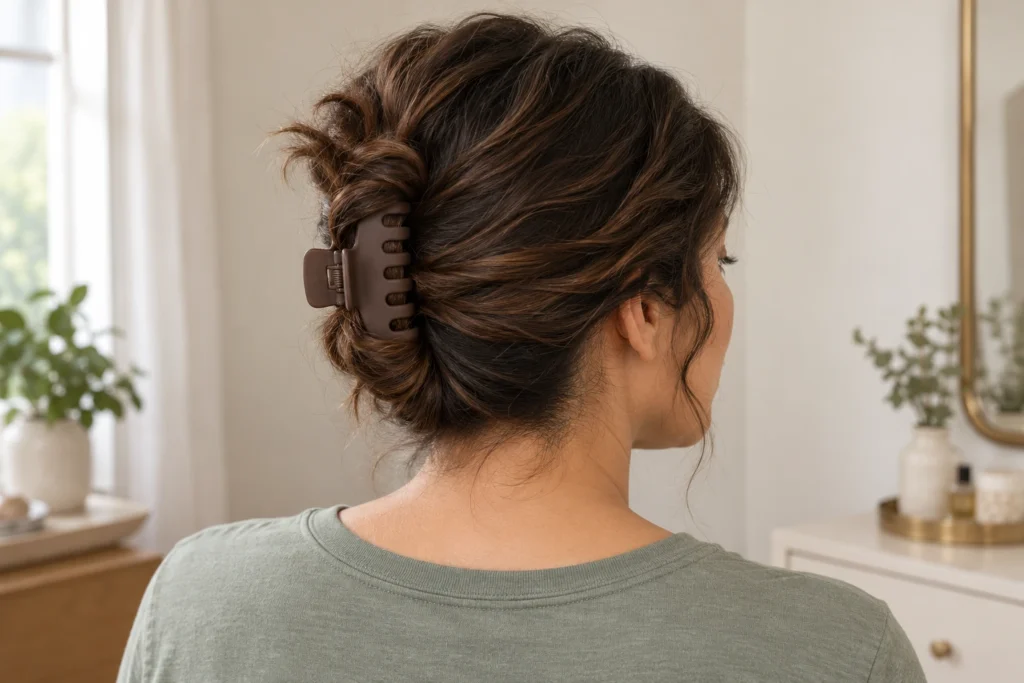
Shop the inspiration: View Kitsch’s Medium Curved Claw Clips, a two-piece black and tortoise-print set on the brand’s US storefront. Choose the clip capacity for the amount of hair you want to gather, and check the current listing and local purchasing options for your country.
For either updo, turn your head and look down before leaving the mirror. If the fastening presses into your neck or catches your collar, shift it slightly and check again.
Two Ponytails With Different Shapes
5. The Softly Gathered Low Ponytail
A low ponytail is a practical option for a blunt lob, longer layers, or a day when you want the simplest possible fastening.
Arrange your part first, then gather the hair just above the nape. Secure it with a fabric-covered elastic.
Smooth only the surface that needs arranging. Waves, curls, and a few natural flyaways can remain part of the finish.
If the sides puff out, release the tie and gather them again in their natural direction. Pulling the base tighter often makes the roots feel less comfortable without solving the shape.
On fine hair, try a smaller tie that does not overwhelm the short tail. For waves, let the existing bends remain visible. On dense hair, a substantial scrunchie may be easier to handle than a narrow elastic, provided it holds without repeated tight wrapping.

A low ponytail also leaves an open neckline visible. If you are adding jewelry, our guide to layering necklaces with different necklines can help you place the chains around your top.
6. The Loose Mid-Height Curly Puff
This version gathers curls or coils while letting the ends form a rounded shape. It does not require brushing the lengths straight.
Start with hair that is already gently detangled. Use your hands to guide it toward the middle back of your head, then secure it with a soft, appropriately sized scrunchie.
Arrange the ends with your fingertips, lifting small groups of curls rather than combing through the finished puff.
If the hair at your nape cannot reach comfortably, lower the base. If only the top section reaches, make a half-up puff and leave the lower curls loose.

Avoid tightening the tie simply to reduce the puff’s size. Choose a lower position or a different amount of gathered hair instead.
When detangling is needed, the AAD’s curly-hair guidance recommends working in sections through wet, conditioned hair with fingers or an appropriate comb or brush, rather than brushing curls dry.
For humid weather, choose a silhouette you also enjoy with a little more fullness. On cooler days, check that your ponytail or puff clears a raised coat collar without constantly rubbing or being pushed upward.
Two Simple Braids That Do Not Need French-Braiding Skills
7. A Small Side Accent Braid
An accent braid adds detail while leaving most of the hair down. Because you braid only a small section, the whole haircut does not need to reach one fastening point.
Take a section just behind one temple and divide it into three strands.
Cross the outside strand over the middle, then the opposite outside strand over the new middle. Continue alternating, without adding extra hair, and secure the end with a small covered elastic.
Let the braid lie beside your face, or guide it back and pin it into the loose hair.
Begin slightly farther from the hairline if the shortest front layers keep escaping. A short braid with a loose tail is enough; you do not need to braid down to the very tips.
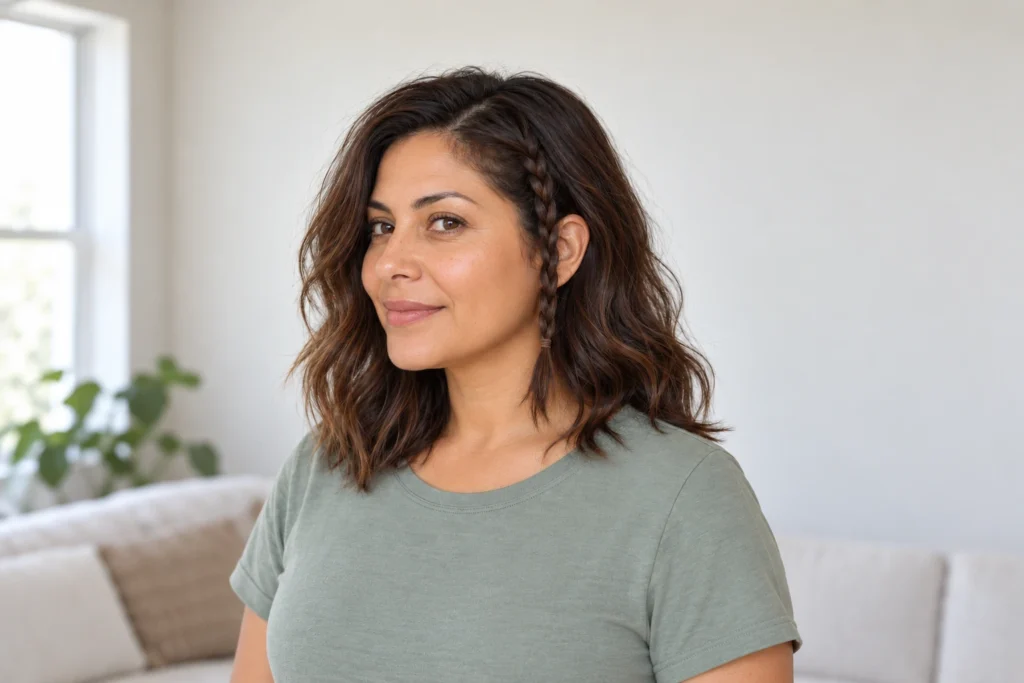
For fine hair, keep the section small enough that the loose hair around it still looks balanced. With denser hair, separate the section carefully before starting so neighboring strands do not keep joining the braid.
8. Two Low Three-Strand Braids
Dividing the hair into two sections can make a medium-length cut easier to braid than trying to bring everything into one long braid behind your head.
- Divide the hair down the back into two sections. A practical part is enough.
- Bring one section forward near your shoulder.
- Split it into three strands and alternate crossing each outside strand over the middle.
- Stop while there is still enough loose tail for a small elastic, then repeat on the other side.
Keep the roots relaxed. If a braid looks uneven, redistribute the three strands before starting again. Tightening one strand usually makes the shape more awkward.

With layers, stop braiding where too many ends begin to escape. If you have very little usable length, choose the accent braid instead.
For less time with your arms raised, work on each braid in front of your shoulder while seated. Use a second mirror afterward to check the part and the placement of both bases.
Frequently Asked Questions
What Is the Easiest Updo for Shoulder-Length Hair?
A low loop bun is a useful first try if your hair reaches a low ponytail. If the ends slip out of the loop, try a compact claw-clip twist. With shorter nape layers, a half-up style may be easier than gathering everything.
How Can I Make Medium-Length Hair Look Fuller Without Teasing?
Try a small half-up section that leaves most of the hair loose. Keep the fastening modest and ease a little hair above it with your fingertips. A smaller accessory can also keep a short tail or bun from looking overwhelmed.
Why Does My Claw Clip Keep Sliding Out?
Check how much hair sits between the jaws and whether the teeth catch underlying hair as well as the twist. A clip that is too roomy may move around a small section. One that cannot close needs more capacity or less hair inside it.
Can I Do These Hairstyles With Bangs?
Yes. Leave bangs or face-framing pieces out before gathering the rest. To keep them back, secure them separately with a small pin if they reach comfortably. They do not need to be stretched into the main tie.
Do I Need to Straighten My Hair First?
No. Use your natural or already-styled texture as the starting point. The finished outline will vary: straight hair shows the fastening clearly, waves keep their bends, and curls create a fuller tail, bun, or puff.
Which Style Should I Choose for an Event?
Start with one you can secure reliably, such as a low loop bun, side twists, or a half-up ponytail. Test it with the neckline, earrings, and collar you plan to wear. Check the back and make sure you can turn your head comfortably before adding decorative accessories.
Pick One Style to Make Your Own
Begin with the fastening point your hair reaches comfortably. Choose half-up when the lower layers need to stay loose, a low bun or twist when you want your neck clear, or braids when you want to work in smaller sections.
Practice that version first, then change the part or accessory once the basic shape feels familiar.


2 thoughts on “Easy Hairstyles for Medium-Length Hair: 8 Looks to Try at Home”